March 23, 2010

Bleh.

Normally I try and keep this blog very upbeat and cheery.  Normally I try and keep myself upbeat and cherry (with a good dose of sarcasm mixed in).  Today I am feeling bleh.  Really bleh.  UGH.  I feel just exhausted, and for no good reason.  We haven't been crazy busy lately (!), I way overslept today and didn't go back to the gym like I told my husband that I would, so I should be well rested, but today I just feel a little overwhelmed and nervous about things in general, and honestly a little down.  I do have a lot of stuff for me up in the air right now, but no real reason for feeling the way I do today.  So I've decided to post random pretty pictures that I've loved for a while now that didn't really have a post to home them. 

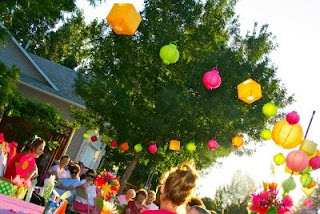
Here's my recent favorite photo (sorry I don't know where it came from)

And then here are some more really relaxing lovely photos.  All of which make me wish I were in any one of them instead of where I am today.

And I really love this one with those blue chairs!

March 19, 2010

Alice in Wonderland Party

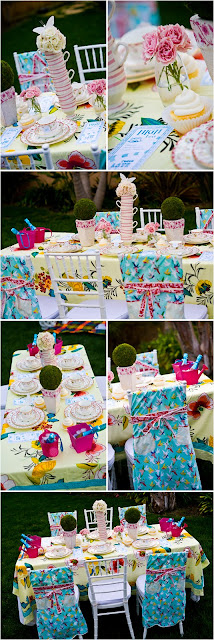
Tonight I am going to see Alice in Wonderland - and I'm SOOO excited!  I've been waiting to see the movie for months but have been to sick the past few weeks to go.  In honor of the movie I am going to share some images to help inspire your own Alice in Wonderland event.  You could use this theme for a birthday, shower, or theme party, and I have even seem some weddings with elements of this as well.  Enjoy!


If you are planning an Alice in Wonderland party make sure to use tons of color and pattern.  I wouldn't shy away from whimsical touches and would go with the 'more is more' mantra!


Many of these photos are by Jessica Claire, the bottom montage is from Project Wedding. 

March 3, 2010

Shabby Chic Eye Candy

To prove that I really don't love writing essays in my blog posts today I am going to share some picture love.

I tend to be kind of girly.  Sometime a lot girly.  I like pink (a lot) but I try to keep my decorating fairly gender neutral and middle of the road.  If I lived by myself or had freedom to decorate a space to myself I suspect that I would decorate somewhat 'shabby chic'.  I don't think I could ever do my house over the top in this style, but I love it in moderation (does that make sense to anyone else?). Even though I wouldn't consider my personal tastes to be overly floral or frilly, sometimes a girl needs a little of that!  I think that what draws me personally to this style is how relaxed and inviting it seems.  Wrinkles, cracked paint, patinas, and worn fabrics all seem so comforting! 

I'm not sure on the source, but isn't it lovely to see the neutralness of this photo with the simple white dining chairs, chippy paint, and gorgeous chandlier.

Merker Interiors

 
No original source, I found it here.

I don't think I've ever seen a mattress on the floor look so lovely.
No original source, I found it here.

Not your typical 'shabby' but still so fun, comfy, and inviting. 
Found at the same blog from above.

From the Velvet & Linen blog (!) here is a picture from Steve & Brooke Giannetti's home.  To view their home tour click here.  They've since made several changes to make things more gender neutral, but I really love how 'moderately' shabby their house is. 

Shabby Chic

Lastly I want to end on a high note.  Last year Rachel Ashwell, the woman behind Shabby Chic stores (and really the 'creator' of the style) had to file chapter 11 bankruptcy for her stores and product line.  She wrote publicly about this on her blog.  Happily her Simply Shabby Chic line did remain in Target stores.  Now she has resructured her business and through alot of hard work and dedication has opened a new line of stores both here in the US and in London named, Shabby Chic Couture.  For more information about her product lines, stores, or to read her blog click here.

March 2, 2010

Unfinished Finished Basement Before & After

Warning: ANOTHER LONG (and wordy) post to follow (sorry)


I've been wanting to do this post for a few weeks but haven't been able to churn it out due to all the craziness that's been going on. I mentioned in the blog post from yesterday that my husband and I decided to 'finish' our basement for the bridal shower I'd be throwing. By finish I really don't mean 'finish' in the traditional meaning of basement finishing. We wanted to give it a 'facelift' if you will.

Unfortunately I don't really have great 'before' pictures of the space. I found a few photos that were taken the day that we moved in that kind of show the basement, but they aren't great. I'm including them in here anyways. My house is considered a raised ranch, but it SO doesn't look like it. Basically our basement is under our house and houses our garage/work space on one side and our laundry room/basement on the other side. The basement side of the basement has a separate entrance and is where our laundry machines are located. there are two regular sized windows and three little basement windows. There is also a fireplace at one end. Here are the before pictures:

Laundry side from the garage door
Fireplace side, also taken from the garage door.  Built in closets are to the immediate left of this photo

Awesome, right?


When deciding what to do for this space I knew that I wanted to be able to create different areas. First of all I really wanted to create as much of a separate laundry 'room' as possible. I had originally had the idea of hanging things from the ceiling to denote the space. However after talking with my husband and lots of other stuff we decided to make a room divider screen. We went to the rehabitat store near our house (if you live in KC and haven't been there you are missing out!) and found 4 sets of bifold closet doors. They were in pretty rough shape. They were stained brown and some of them had been partially painted white - a project that had been abandoned and left some of the doors partly white-ish while the rest of the doors remained brown. Hands down painting these bifold doors was the WORST project EVER. E-V-E-R. Also on the laundry side there was an existing bathroom vanity with sink (which was not being used, the water had been turned off to the faucet) and a countertop. The vanity separates the washer and the dryer and the countertop is on the opposite side of the dryer. And that is the laundry area.

Outside of the laundry area the basement had white-ish walls (very dingy), florescent work lights (3, ugh!), and cords sticking out of the ceiling and down the wall nearly everywhere you looked. The fireplace was red brick and dingy. The floors were grey. There are also 2 different ceiling heights and two built in closets.

Plan of attack:

• Separate the laundry area from the rest of the basement

• Paint the walls, trim, and the floor

• Paint the fireplace

• Hang up window treatments

• Figure out a way to hide all the wires.

• Swap out the lighting (NO fluorescents please!)

We started by painting the walls an aqua/teal color and the floors a dark chocolate brown. We painted one half of the basement, the side with the fireplace. Although we thought the floors and walls looked good, something was off. The red brick fireplace went from looking a little rough to looking flat out DINGY. It took me all of 3 seconds to decide that the fireplace had to be painted white. A few days later and a couple of coats on the fireplace and things immediately looked so much brighter and cleaner! We also were able to repurpose a shelf that had been hanging on the wall into a mantel for the fireplace. Hooray - brand new fireplace!

We finished painting the rest of the room with the aqua on the walls and the chocolate on the floor. We began painting the bifold doors a bright white and painted the trim a matching white. Chris (my hubby and in house worker man) took the sink off of the vanity and put a thick piece of ply wood on the top of the vanity so we could use it as a countertop in the laundry area. I've been using it to store our laundry baskets and once I hang a rod will use the adjoining countertop as a folding area. All of the built in closets and the ceilings were painted in the wall color to try and minimize all of the weird angles and heights in the room. Once all of the wall and floor painting was done we went back to the Rehabitat store and bought some of the (don't judge) industrial plastic floor trim in white. Although I am the first to admit that plastic floor trim isn't the height of sophistication I will also admit that occasionally my basement leaks. When that happens I don't want it to happen with wood floor trim, so I'll be a little ghetto with my plastic floor trim.

There is one more area that I want to highlight in the basement makeover before I get to the photos: lighting. As previously mentioned there were THREE florescent work lights in the basement. They are HIDEOUS. We talked about a couple of different options but in the end did something a little creative and went with lamp shades. Yes, we used plain lampshades with big light bulbs and made our own very inexpensive light fixtures. For under $10 each they are a perfect touch!

The only after photos I have right now are actually from the bridal shower, so here are a few more bridal shower pictures, but mostly look at the fabulous new basement! (hopefully soon I'll be able to show actual basement photos!) And now without further adu here is our new basement:

Views from the outside door looking in & the garage side looking in.  You can see a couple of our lampshade lightfixtures as well as our total paint job.
 
This photo is from the fireplace side looking towards the laundry side.  I LOVE how you can't see the laundry machines!
Close up of the bifold door screens.

Photos of the fireplace, mantel, and cord hiding.  At the top of the fireplace is a board that is running the length of the fireplace wall about 6 inches or so down.  It is painted the same color as the walls but serves as a hiding place for all the hideous wires that are hanging from the ceiling that we couldn't remove or box in.  The paper banners are actually hanging from this 'ledge'.
Close up of the fireplace and repurposed mantel.
Far away shot of the fireplace side.

I hope you enjoyed your pseudo-tour of my unfinished finished basement.  My apologies for the party pics, I will try and get actual basement photos soon.  Additionally I now hate blogger and their weird formatting because I can't get my photos or text aligned the way it needs to, so please ignore the weird formatting.

March 1, 2010

A Coffee House Bridal Shower

WARNING:  LONG post to follow.

 A few weeks ago I hosted a coffee house theme bridal shower at my house.  This was no ordinary bridal shower.  First of all this shower was held in honor of my very bestest friend, Sarah, so it had to be
P-E-R-F-E-C-T.  Which for a party crazed gal like me meant that it had to be over the top fabulous.  Secondly I decided early on that the perfect spot to hold this oen of a kind shower was in my then unfinished, and unsightly, basement.  This meant lots of cleaning, paint (LOTS of paint), and work went into just reworking the space the shower would be held.  I think it is fair to say that the odds were stacked against me.
Luckily I have a fabulous husband to help me with all of my crazy plans. 

Let me begin the shower break down with an explanation of the theme and what I was going for.  Like all of my events I always start with a theme (coffee house), unlike most of my other events I was mainly concerned with having the right space.  I thought that the rest of the details would fall in place.  As far as the space was concerned I wanted to create a cozy, ecletic, slightly off beat space.  I wanted to coordinate the pieces/decor, but not have everything 'match'.  The following is what turned out.
 Sarah and I are HUGE FRIENDS fans from way back. In college we would watch, rewatch, watch, and rewatch FRIENDS on DVD. I'm not sure that there was a single day that went by that we didn't watch or quote FRIENDS. So not only did the idea of a coffee house theme seem perfect for Sarah's bridal shower, but it was not going to be complete without a little Central Perk action. I made this sign from an old window that had been collecting dust in my basement and some paint. I thought it turned out pretty well. I had several offers to take it off of my hands after the shower :) Needless to say it will be staying with me at my house.

 From another old window I had laying around I painted the panes with chalkboard paint and made a menu sign. This was SO easy to do and really added another coffee house element to the shower.

The full menu with a photo of the bride and groom to be. We placed about 12 of the different engagement photos around for the guests to see. I thought it was great for some of the guests who hadn't had a chance to see them.


Coffee & Coffee 'stuff'

For months leading up to the shower I searched thrift stores for brown and teal coffee mugs and serving pieces.
Here is a side shot of one of the food tables with the plates. 

For the favors I boxed up whole bean coffee and placed a teal label on it that had the type of coffee and the fair trade logo. I like to tie bows to everything, it is cutesy and doesn't always go, but it is a habit.  You can see the favors in the background.


There was SOOOOO much food at the shower. I am really not a great baker so I outsourced the menu to the brides sister with the stipulation that I wanted baked goods - lots of baked goods. She delivered and the food was fabulous!

I can't wrap up the photos without a shot of Sarah and I.  What a happy and fun day!


Lastly I want to wrap up this post with 'recipe' for how to throw your own coffee house theme bridal shower.   

  • This theme is great because anything goes for the most part.  Use a space that is a little off beat that will fill easily with the 'coffee' smell and that is a little on the small side so that it feels busier.

  • Use a variety of furniture styles.  For this shower I used a mix of upholstered chairs, a small antique love seat, mis matched dining chairs, and a large modern leather ottoman.

  • Focus on the menu.  make sure and have lots of coffee on hand as well as teas and hot chocolate.  have lots of baked goods around, pies, tarts, muffins, mini muffins, etc. 

  • Have a color scheme, but keep it loose.  When you go in a coffee shop (not starbucks, but real local coffee shops) they are colorful and full of patterns and designs.  Use your colors enough to tie things together but stay away from being matchy-matchy.  

  • Make sure and have music in the background.  Nothing kills a small event like dead air space, but a coffee house isn't a place that you're going to hear birds chirping.  

  • Use a coffee themed favor
 That about wraps up all the details of Sarah's Coffee House Shower.  Thanks for visiting (and sticking with such a LONG blog!)

---

Hosting a small event of your own and not sure where to start?  Check out Creative Event Studio!