Last year my psuedo-niece got a darling little play kitchen for her birthday. The thought of a play kitchen had never crossed my mind until we were visiting and my oldest son became quite enamored with it. He began asking to go to her house and play kitchen! A few weeks before his birthday we were at the thrift store and they had 2 vintage plastic fisher price play kitchens - for $3 each. With him being a boy I honestly never imagined having a play kitchen. I had considered a work bench but had never done anything about it because I really dislike large toys, especially ones that I don't have a place for. Upon seeing the kitchen in the thrift store Davis was like a moth to a flame. He took it pretty well when we left the store but kept asking me to go back and play with it, silly kid. I talked it over with the hubs and considering the 'investment' we decided to get one of the them and make it over. There are tons of tutorials online about how to paint plastic furniture. This is not a tutorial, it's just a good ole before and after. When I was looking around I couldn't find any kitchen make overs on this 'model' of kitchen, so maybe this will add something to the blogging world (doubtful).
 |
| Little Tykes Play Kitchen - Before |
I'm not sure what this kitchen's previous life was, but if I had to guess I'd say a daycare. It was pretty gross looking. Lots of grime and lots of crayon. Luckily the hose did wonders on the grime and the rest came off easily with a magic eraser. Those things really are magic. I'm not entirely sure what my cleaning looked like before I discovered them.
After getting a good scrub down we let it completely dry out. That was hard because it's hollow plastic, so it took a few days. Once it was dry I took some sand paper and roughed up all of plastic areas I was planning on painting. I gave it another wipe down and then taped it like crazy. I don't want to brag (ok, I guess I do) but I did a kick a$$ job taping that thing. Some of the plastic make overs I saw online didn't look like that great of an improvement to me because the execution was pretty bad. I get annoyed when things are done half way (even when I am the one half doing it) so I was pretty set on making sure that I didn't have accidental over spray or that I was doing a bad job overall. I think I used an entire roll of painters tape and then some extra masking tape. It was totally worth it though.
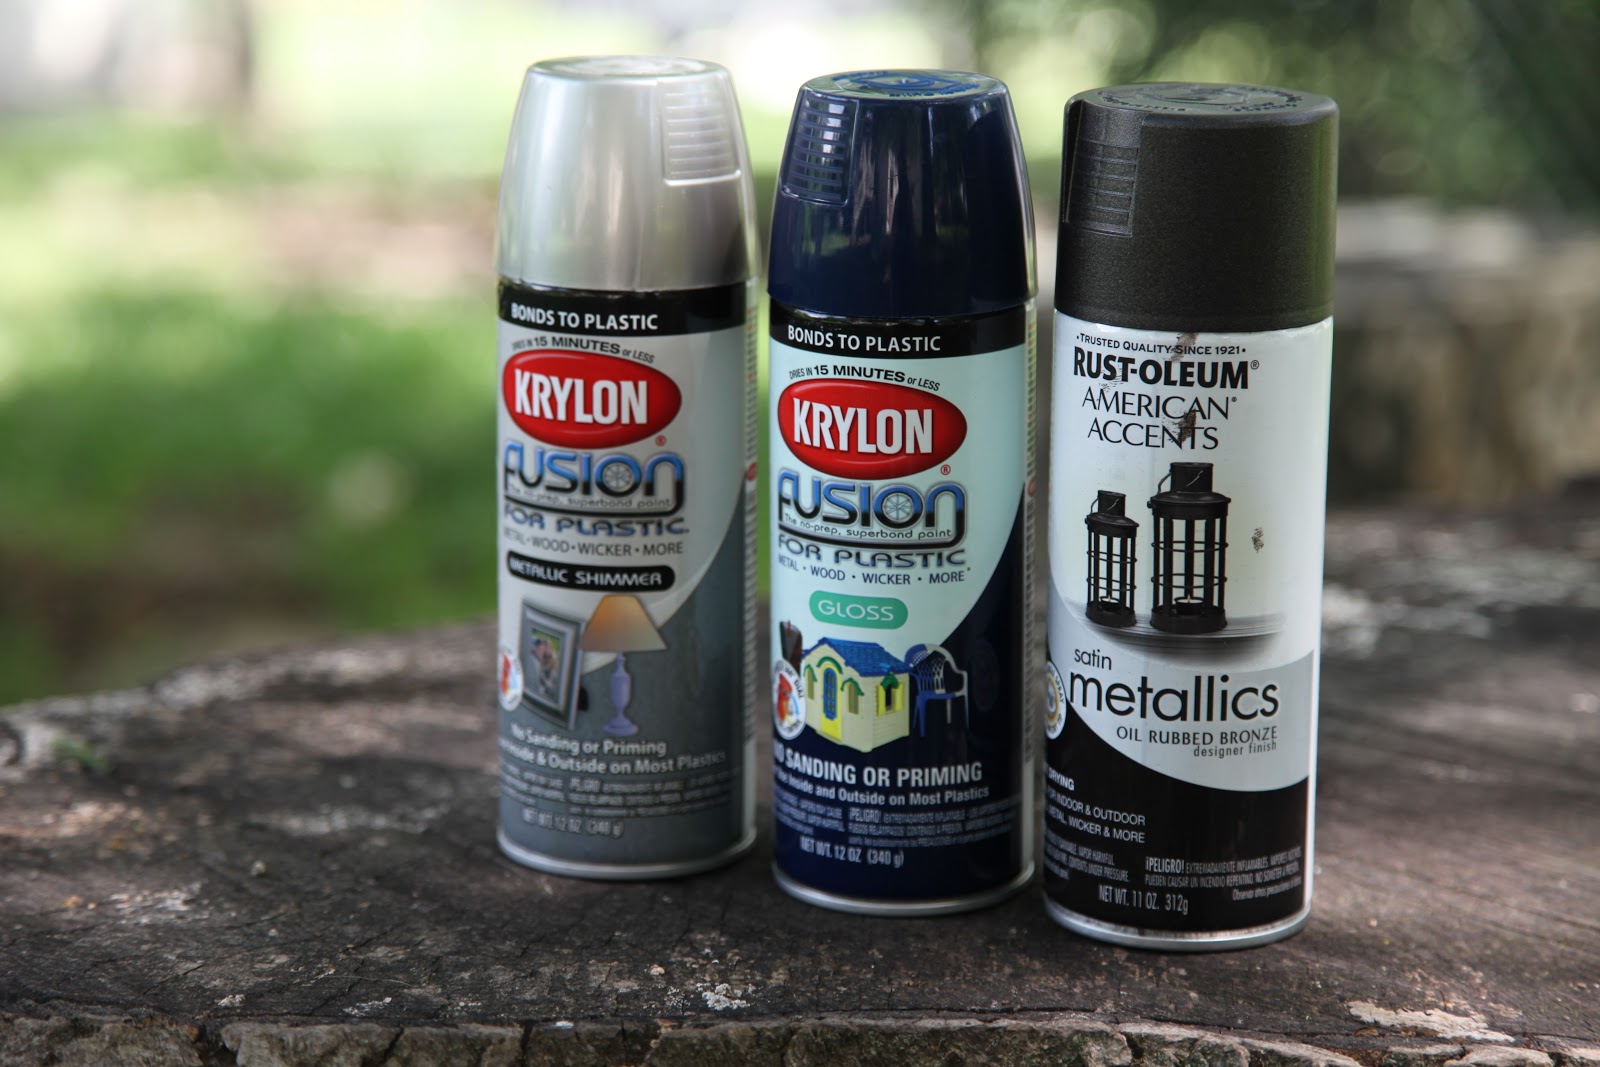 |
| Krylon spray paints for plastic, formulated for toy make overs! |
The roof of the kitchen went from baby blue to navy. The stove top went silver for a stainless steel effect. The faucet, phone holder, and misc other accents got oil rubbed bronze spray paint. I did purchase the Krylon navy paint that was specially formulated for plastic, the others were left over from previous home projects. I've read and had mixed reviews of the Krylon paint and I left this experience feeling the same. The paint goes on evenly without drips, but I'm still not convinced of the adhesion. The kitchen has been in use for about 8 months now. We don't have many scratches, but there are a few. If it were a more 'high traffic' area and not a roof I think that there would be more. I did have some issues with the silver paint splattering when I was spraying it. I ended up with a few splatters that I had to sand off and even a few places where I had to get out paint thinner (then I washed, washed, washed it!). Overall this project was easy to do. This kitchen model came apart well which allowed me to separate out a lot of the pieces to paint. It also was in good shape and was a nice neutral white and not something crazy that I was trying to paint over. I think that was a huge help.
And here are the after's:

| The dishes were also found at the thrift store and are the perfect size for the kitchen and little hands! The black square is chalkboard paper for grocery lists ;) The phone is a grandma gift that happened to fit perfectly in the phone spot. It doesn't match but it works and they love it. |
|
 |
We added a hook on the side that holds measuring spoons and usually an apron. Who knows where the apron was this day. There is a good chance it was being used as a cape somewhere else in the house.
My husband thought that the heavy iron cast burners were necessary to help 'man' up the kitchen. We attached them with liquid nails - they aren't going ANYWHERE! The 'stainless' stove top is my least favorite part because the paint did not spray evenly.
 |
| Little Tykes play kitchen - after |
When I bought the kitchen I thought, 'it's $3, I've got paint at home, easy peasy'. Honestly that is more or less how it went. In total though we ended up putting about $30 into the the kitchen when I count the navy paint, the cast iron burners ($6 each), chalkboard paper for the chalkboard, and misc kitchen accessories. It's still not bad for a big kitchen though! Now that we have two boys old enough to use it the kitchen is getting lots of use from both boys, they love that thing. I think it was worth bringing home and doing! Have you made over any piece of furniture?


👍👍 fun make over!
ReplyDeleteI just got one of these kitchens for my daughter! (Wish mine cost $3 though!) Did you spray a clear coat of anything on top of the color to help protect it? Also, did you do anything else to prep the surface besides sand paper and spray it with water and a magic eraser? Did you just use regular sandpaper or a special kind?
ReplyDeleteThanks in advance for the help! Love your home and decorating. (I was browsing around.) Very modern-vintage. :)
Hi Lindsey! I did not end up doing the clear coat. I bought it, but when it was all over I didn't use it because I kind of wanted to see how the 'plastic' paint would do on it's own with nothing else but a lot of good prep. I figured a non-high traffic place (the blue hood) would be a good place to see if it got really dinged up. It's been a year and a half and there aren't a ton of scratches (and none that are super noticeable to anyone other than me probably) but if I were to do it again I would do a clear coat or go with a regular paint. The metallic paints have held up great. I used regular sandpaper in a medium grit at first then a finer one after. I didn't go too crazy with the sanding because it does scratch the plastic and I didn't want it to damage it. But I definitely gave it a sanding over everywhere the paint went. I'm sure you could use a cleaning spray if you wanted but I just sanded and then cleaned with water and then let it dry out. Good luck with your make over! I bet it will be a hit!
ReplyDeleteThis comment has been removed by the author.
ReplyDeleteSo, I just found one on the side of the road. #trashpickvictory! But I need to take it apart to make sure creepy crawlies aren't living INSIDE, there were a bunch on the outside. Did yours come apart easily enough? I see in the wash-off pictures it's in pieces. Did you need any tools or did it just kind of come apart? I don't want to risk breaking mine so any pointers would be super appreciated!
ReplyDeleteThanks!