Showing posts with label DIY. Show all posts

June 8, 2016

Teenage Mutant Ninja Turtle Birthday Party

My baby is getting ready to turn 5 in a few weeks.  I literally can not wrap my head around FIVE.  I just keep turning it over and over in my head wondering how it has went so fast.  (And then I read this by Katie and this by The Nester and I basically just sob because it never stops.  Parenting is so lovely and strangely hard. #bittersweet)  Anyways, back to the point at hand - Ninja Turtles!  When my nearly-5 baby was nearly-4 he desperately wanted a TMNT birthday party.   Because I take a long time to process my thoughts and am a terrible blogger who doesn't post things anywhere online in a timely fashion this post is a year late.  But somehow it feels ok to share this party in honor of his upcoming birthday, which I know makes no sense to anyone but me.  #thatsok

I love, love, love being a boy mama.  I love the loud, dirty, wrestling around, skinned knees-ness of boys.  But one of the things I struggle with HARD are characters.  Oy, the characters.  And boy characters pretty much all follow the same themes - they fight, they defeat bad guys, they have super powers &/or are weird.  So when TMNT came up I fought it.  I am fighting the good fight for all of us character-disliking mamas out there - and I am epically losing.  Bleh.  So when this came around as the toy/character of choice I decided that I would be ok with the fun-happy-silly turtles of the 80's, not the mean, aggressive, grunting TMNT of 2014.  (I'm hoping that I'm not the only mother out there who has grossly over thought this.)

But I digress.  So, how about if I actually talk about the party?  After over-analyzing if we should do this theme or something else I knew that our kiddo would love it the most and we went for it.  Honestly I had no idea how to make it fun.  I wanted it to be interactive and not just a lot of cutesy decorations. I decided pretty early on that I needed a few basics to do this party.


Pretty simple, right?  This party was very easy to set up.  We created a maze that had Turtle silhouettes on foam core at the entrances.  The maze was made of plastic electrical conduit that was cut in thirds, Dollar Tree pool noodles, and crepe paper streamers.  The whole maze cost around $20.  We had clothes line poles at our last house and we hung balloons at varying heights from the clothes lines.  That was the biggest hit of the whole party with the kids!  At the entrance of the maze we set up a tub with foam swords (also from the Dollar Tree) and DIY TMNT masks.  We didn't have many girls at the party but I can attest that the boys LOVED the swords and fighting the balloons.  Those things didn't stand a chance!  If you are throwing your own Teenage Mutant Ninja Turtle themed party this is the one thing that you have to do!

I wish that the pictures of the yard weren't so blown out.  But that's what happens when you have to shoot in full sun, you get the harsh sun/shade shadow.  To do the maze take your 10 foot electrical conduit and cut it into 3 pieces with a saw.  Then take a rubber mallet and tap them into the ground.  Slide your pool noodle over the tubing and then wrap the paper around streamers around different sections of the noodles making 'walls'.  Seriously, the possibilities are endless with this idea.  For the turtle silhouettes I picked up the black foam core from the Dollar Tree (#unofficialsponsor) and had my friend from Sprinkle The Kindness make me the turtle silhouettes.  She also cut the letters for the Happy Birthday sign behind the cupcake/gift table.


The rest of the party was just as simple.  I did paint the TMNT peg dolls for the cupcakes, but those were mostly for me because I thought it would be cute (my son declares that he 'hates peg dolls') and I wanted to do them.  For something similar you could look for something on Etsy or just use smaller figurines.  I had grabbed the green 'Pizza' banner after Christmas because I had a sneaking suspicion I would end up doing a turtle party.  I used some striped washi tape to spell 'Pizza'.  I used a scrap piece of wood to make a 'Mutagen' sign for a batch of green punch.  


And that's that!  If you are planning a TMNT themed party what are your plans for the day?  

---
Looking for more birthday party inspiration?  You might enjoy these too:


January 18, 2016

Huffington Post Feature

Last December in the midst of our move I clicked over here to the blog to try and write a post when I noticed that I had a lot of page views coming in from a Huffington Post link.  I thought it was weird so I clicked on the link and was very surprised to find that our play kitchen make over had been picked up (likely via Pinterest) on one of their features in the Parents section.  (Click here for the feature.)  Apparently the original article ran in June of 2015.  I've never had any of my work featured (on this blog or through Creative Event Studio) without being notified...it felt kind of weird and really gave me a check about how small the internet really is.

The feature is a slideshow compilation of various plastic play toy make overs.  (Why are toys made to be so ugly?)  Of course it's incredibly flattering (and very exciting) that our project was chosen out of all the stuff that's out there (especially considering the indoor, unstaged/styled photos) and if you'd like to take a look at feature click on the image below to see all of the different projects.  Our kitchen is number 13.  To see the original post about our process and before/afters click here.


Has something like this ever happened to you?  If so did you have mixed feelings too, or is that just me?

August 27, 2015

Purple Craft Baby Shower

During my blogging hiatus I had the great joy of hosting a baby shower for a friend of mine from church.  This mama is crafty and her favorite color is purple.  Instead of doing an elaborate theme I decided to keep things simple with everything tied in through the color palette.  I used purple fabrics that had accents of brown to make tassels and sew pillow covers, did a white themed dessert buffet, and set up a onesie craft station for the guests.  It came together well and was the perfect amount for the guest of honor, which means it was just perfect.


To make the tassells I simply ripped strips of fabric and tied them with yarn.  I chose not to cut the fabric because I wanted them to have a more relaxed feel.


Anytime I throw a shower where I know there will be lots of guests I do a Bingo game.  It helps keep guests interested in what is happening and helps the gift opening move a little faster.  


For the craft station I picked up several plain onesies and set out a variety of different craft items (paint, buttons, iron on patches, stamps).  Because I knew that not everyone at the shower would be able to come up with an original idea quickly I also printed out some prompts and set them on the table for inspiration.  The craft station was lined with brown craft paper.


My shower was in the mid afternoon, which meant that a full menu wasn't necessary.  Instead I opted to do a dessert bar tied together with a neutral color scheme.  I focused on white desserts and served water and coffee.  I found the chalkboard several years ago and painted it for the coffee house bridal shower.  It gets a lot of use whenever I host events, usually as a menu sign.


I really enjoyed being able to host this shower.  I loved the simplicity of the decor and the opportunity to use a looser theme.  If you are hosting a similar event here are some tips to keep in mind:

  • When using colors as your theme vary the shades and patterns
  • Always remember to add texture.  In this shower I used cotton fabrics, pom poms, paper, and purposely tore fabric.
  • Think about how you can switch up your normal decor to tie in the event.  For this shower I sewed a few pillow covers to match the party.
  • Don't go over board on your menu.  It's easy to over think food and feel like there won't be enough but many showers aren't held at a typical meal time, which means that you don't need to serve a full meal.  Also remember that many people won't eat one of everything you put out.
  • Shop your house before buying!  For this event I purchased the wooden letters to spell 'BABY' and 2 bags of purple and tan pom poms (not counting food).  When you purchase entertaining supplies throughout the year try and keep them neutral (white and clear glass always work well for me) so that they can be used over and over again.  
  • HAVE FUN!  There is no point to hosting the event if that means that you aren't going to be a part of the event.  Do everything you can as early as you can so that once your guests arrive you can relax and enjoy the day!

April 30, 2015

DIY Fort Kit

I thought I'd pop in today with a great little DIY project for all the kiddos in your life.  I made this Fort Kit for my nephew's birthday.  I love the idea of tents for little kids, but often they are large and require space that many of us don't have.  This is a great alternative that let's kids have the experience but that doesn't require the space commitment.  

Once you have your supplies this project can easily be completed in an afternoon in less than 2 hours (I'd estimate it to take about an hour, maybe a little more).  This is not a tutorial.  If you're crafty you don't need it. (And if you need some hand holding there are tons of instructions online.) I used a canvas bag, leather string,  letter stamps, black paint, green dye, a plain white sheet, yellow paint, a stencil, and a paint brush.  For the completed kit you will also need 4 clamps (I picked mine up at Lowes).  I also included a glow stick flashlight that was a big hit.


For the bag I found a canvas bag at the thrift store.  I cut the handles off , cut a small hole in top hem and threaded leather string through.  I had some RIT dye at my house so I quickly dipped the bag in it on my stove top.  I ended up with a soft green.  I also used my stamp kit to print 'FORT KIT' on the front.  

DIY Fort Kit for kids

I used a white sheet from the thrift store (I brought it home and bleached it, but made sure in the store that it was free of staining) for the 'tent' part of the kit.  For the stars I used a stencil from Hobby Lobby and randomly painted them with yellow paint all over the sheet.  Once they dried I washed the sheet.  I did not use fabric paint, just regular ole craft paint.  


I should have taken a picture of this all set up but I didn't!  To assemble the fort just use the clamps to secure the sheet over the backs of chairs, doors, or whatever your little one is desiring.  I love gifts that don't have one specific way to play with it and this is definitely something that can be used over and over in millions of different ways.

DIY gifts are something I really enjoy making.  (If they are enjoyed as much upon reciept may be another question!)  Out of the childrens 'toys' I've made this still ranks as a favorite.  Do you like making gifts?  Do you know any kids that would like something like this?

March 13, 2015

Litle Tykes Play Kitchen Make Over

Last year my psuedo-niece got a darling little play kitchen for her birthday.  The thought of a play kitchen had never crossed my mind until we were visiting and my oldest son became quite enamored with it.  He began asking to go to her house and play kitchen!  A few weeks before his birthday we were at the thrift store and they had 2 vintage plastic fisher price play kitchens - for $3 each.  With him being a boy I honestly never imagined having a play kitchen.  I had considered a work bench but had never done anything about it because I really dislike large toys, especially ones that I don't have a place for.  Upon seeing the kitchen in the thrift store Davis was like a moth to a flame.  He took it pretty well when we left the store but kept asking me to go back and play with it, silly kid.  I talked it over with the hubs and considering the 'investment' we decided to get one of the them and make it over.  There are tons of tutorials online about how to paint plastic furniture.  This is not a tutorial, it's just a good ole before and after.  When I was looking around I couldn't find any kitchen make overs on this 'model' of kitchen, so maybe this will add something to the blogging world (doubtful).

Little Tykes Play Kitchen - Before
I'm not sure what this kitchen's previous life was, but if I had to guess I'd say a daycare.  It was pretty gross looking.  Lots of grime and lots of crayon.  Luckily the hose did wonders on the grime and the rest came off easily with a magic eraser.  Those things really are magic.  I'm not entirely sure what my cleaning looked like before I discovered them.


After getting a good scrub down we let it completely dry out.  That was hard because it's hollow plastic, so it took a few days.  Once it was dry I took some sand paper and roughed up all of plastic areas I was planning on painting.  I gave it another wipe down and then taped it like crazy.  I don't want to brag (ok, I guess I do) but I did a kick a$$ job taping that thing.  Some of the plastic make overs I saw online didn't look like that great of an improvement to me because the execution was pretty bad.  I get annoyed when things are done half way (even when I am the one half doing it) so I was pretty set on making sure that I didn't have accidental over spray or that I was doing a bad job overall.  I think I used an entire roll of painters tape and then some extra masking tape.  It was totally worth it though.


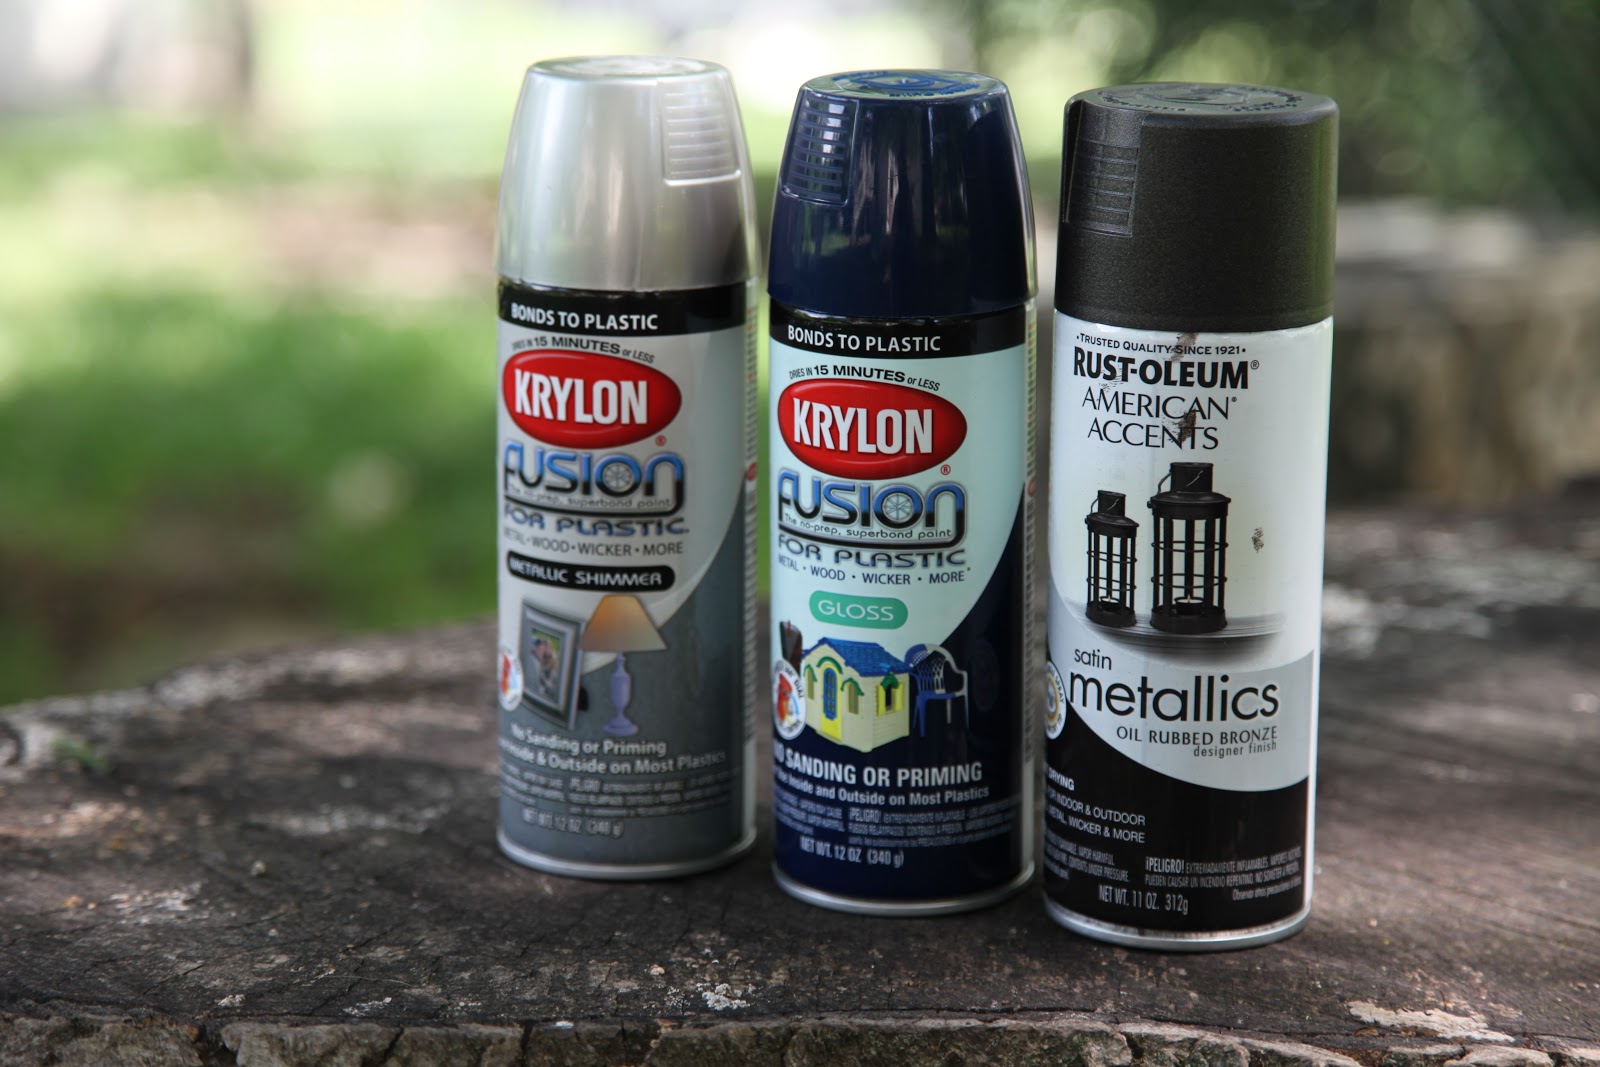
Krylon spray paints for plastic, formulated for toy make overs!
The roof of the kitchen went from baby blue to navy.  The stove top went silver for a stainless steel effect.  The faucet, phone holder, and misc other accents got oil rubbed bronze spray paint.  I did purchase the Krylon navy paint that was specially formulated for plastic, the others were left over from previous home projects.  I've read and had mixed reviews of the Krylon paint and I left this experience feeling the same.  The paint goes on evenly without drips, but I'm still not convinced of the adhesion. The kitchen has been in use for about 8 months now.  We don't have many scratches, but there are a few.  If it were a more 'high traffic' area and not a roof I think that there would be more.  I did have some issues with the silver paint splattering when I was spraying it.  I ended up with a few splatters that I had to sand off and even a few places where I had to get out paint thinner (then I washed, washed, washed it!).  Overall this project was easy to do.  This kitchen model came apart well which allowed me to separate out a lot of the pieces to paint.  It also was in good shape and was a nice neutral white and not something crazy that I was trying to paint over.  I think that was a huge help.

And here are the after's:


The dishes were also found at the thrift store and are the perfect size for the kitchen and little hands!  The black square is chalkboard paper for grocery lists ;)  The phone is a grandma gift that happened to fit perfectly in the phone spot.  It doesn't match but it works and they love it.
 We added a hook on the side that holds measuring spoons and usually an apron.  Who knows where the apron was this day.  There is a good chance it was being used as a cape somewhere else in the house.

My husband thought that the heavy iron cast burners were necessary to help 'man' up the kitchen.  We attached them with liquid nails - they aren't going ANYWHERE!  The 'stainless' stove top is my least favorite part because the paint did not spray evenly.  

Little Tykes play kitchen - after
When I bought the kitchen I thought, 'it's $3, I've got paint at home, easy peasy'.  Honestly that is more or less how it went.  In total though we ended up putting about $30 into the the kitchen when I count the navy paint, the cast iron burners ($6 each), chalkboard paper for the chalkboard, and misc kitchen accessories.  It's still not bad for a big kitchen though!  Now that we have two boys old enough to use it the kitchen is getting lots of use from both boys, they love that thing. I think it was worth bringing home and doing!  Have you made over any piece of furniture?

March 11, 2015

Rustic Glam Baby Shower Invitations

I have 2 sister-in-laws.  One of them is getting ready to have a baby!  It's quite the stir around here because she is having a girl - and our family doesn't have girls!  We're a pretty small group but my other sister-in-law and I decided that this definitely warranted a baby shower.  We're loosely going for a rustic glam theme.  Obviously we'll be using pink!  Gold and glitter are also on tap.  Though the invites don't have much of a rustic vibe (at all) they are pink, girly, and glam!


Supplies for this project included textured grey cardstock, gold glitter cardstock, brown kraft envelopes, a corner rounder, gold striped washi tape, scissors, rubber cement, and embossing gun, clear embossing powder, an embossing pen, and a paper cutter.    I had all of the basics at my house but had to purchase the grey and gold papers, rubber cement, envelopes, and clear embossing powder.  The total for all supplies was around $17 at Hobby Lobby. 

Gold glitter envelope liners

I love lining envelopes when I make invitations.  In my mind it just takes the entire 'experience' up a notch.  It's very easy to do.  I'm not making a tutorial of how to do that, it's easy enough to find one on Google.  But basically you use use a piece of spare paper and cut to fit inside of your envelope to make a template.  I lined these envelopes with gold glitter card stock, using rubber cement to secure them.  Tip:  when glueing the liner in place only put glue on the top part of the liner (the piece that lays against the flap of the envelope), this allows for the liner to move as the envelope is folded and prevents accidental bubbling/creasing.  I also sealed the package with a strip of gold striped washi tape.  Love washi tape!

Invites made with a design from Craftberry Bush

Confession:  I ran a little short on time in designing the invites, oops.  I had come up with a few designs but never could settle on one I loved.  I found this free watercolor design on Pinterest and knew it would work perfectly for what I was needing.  I used it for the invites, registry cards and envelope labels.  Done, done and done.

DIY embossed invitations
To bump these invites up a notch I used a textured cardstock (which unfortuantly did not photograph well) and then did some selective embossing on the floral design.  I love embossing for these small projects!

I'll be posting our inspiration board for the shower next week so make sure and stop back by to see what we've got in mind.  Are you guys planning anything lately?  Pinterest has completely changed the way most of us approach our event planning, how much do you use it for your parties?